Tampilkan postingan dengan label You Should Know. Tampilkan semua postingan

Senin, 22 Desember 2014

You Should Know: Turn Your Laptop Into an Inspiration Board
You Should Know: Turn Your Laptop Into an Inspiration Board

_MG_2157

_MG_2161

You probably spend a lot of time on the computer. If you're like me your morning starts with grabbing a cup of coffee, opening the laptop, logging into a blog feed aggregator, (feedly for me, thanks Steph!) and catching up on the day's news, emails, and posts.

If you're a blogger (and I know many of my readers are!) you probably spend even more time on the computer editing photos or videos, writing up posts, communicating, and promoting your blog. I think my computer is probably the tool I use the most, even more than my camera. As soon as I got my first laptop, I knew that I wanted the thing I sat in front of for a long time to be not only functional (files organized, unnecessary programs deleted as soon as they became redundant, appropriate things backed up on an external hard drive) but also beautiful which is a lot harder when you're sitting in front of a cold piece of aluminum with a clacky keyboard.

Over the years I've put two things into place to turn my laptop into an inspiration board, both physically and digitally.

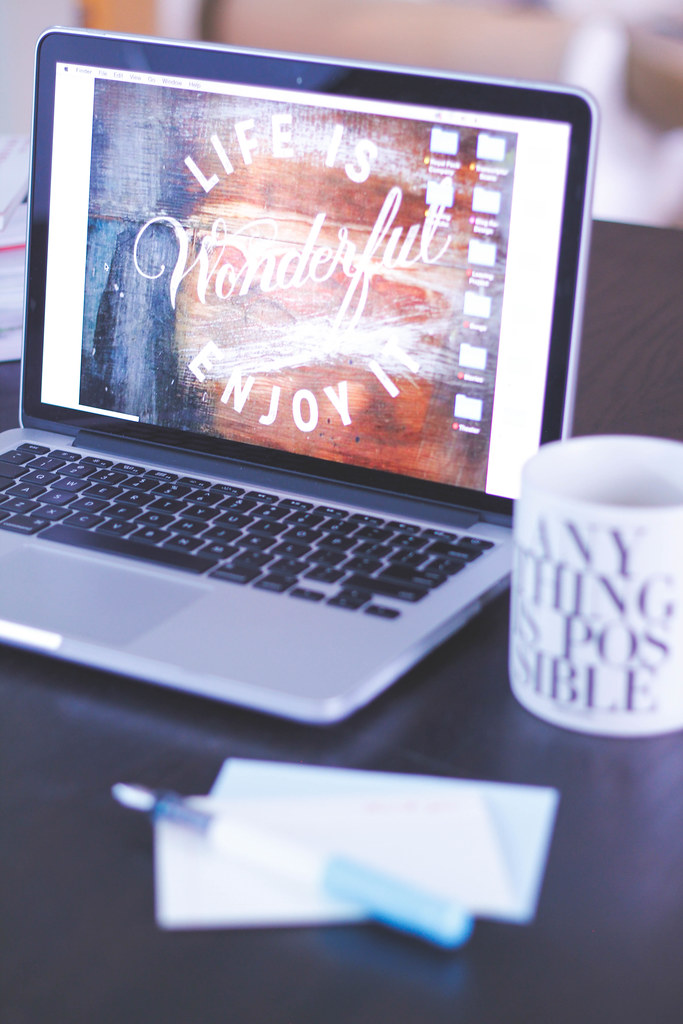
First, I use the rotating background photo feature on my mac to create an inspiration board. I have a folder saved on my desktop called "Desktop Photos" and whenever I see a beautiful piece of typography with a great quote or statement I right click and save the image to that folder so that it gets thrown into the queue. I have about thirty or forty beautiful quotes saved and they rotate every five minutes so that I never know what I'm going to get. Sometimes, when I close a program in frustration or wake up groggy in the morning and open the laptop lid I get a quote that makes me laugh or spurs me on and reminds me to put my best effort into everything. There's a lot of wisdom in this world and it's important for me to pay attention to it!

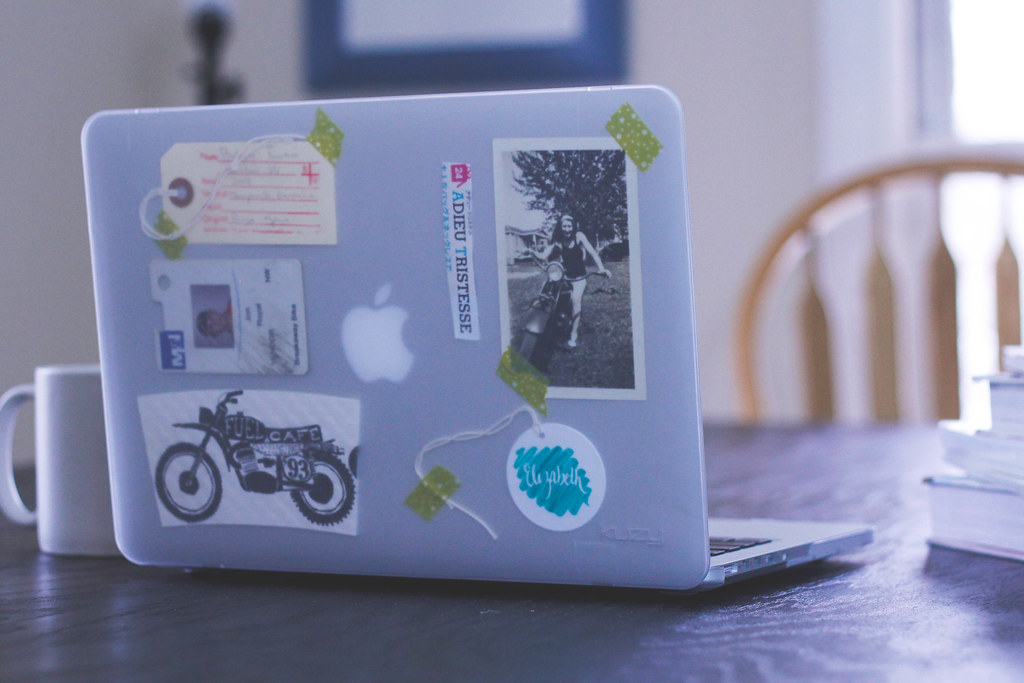
Second, I slip small momentos under a clear hardshell case and sometimes use washi tape to help keep them in place. When I got my first macbook I decided to invest in a case to protect it since I was traveling a lot at the time. I just wanted a basic clear case to keep the computer as simple as it came. A few years into having a clear case on my computer I discovered that I could slip things under the case and voila! Instant inspiration board! Over the years I've had a myriad of different things: pages torn from magazines, inserts from albums I have purchased, and assortments of small things that I've collected along the way. My most recent case iteration isn't completely clear because I bought a cloudy one on accident but I figured I'd give it a go and I do like how it looks - it tones down whatever I have on the back of my laptop which gives it a calmer and less cluttered feel.
_MG_2136
(Clockwise, from top left corner: The wine tag from a glass of wine from one of my favorite restaurants in Denver, "Adieu Tristess" clipping from a magazine, a 1940's photo of a girl on a motorcycle that I found at an estate sale, my name as written by the amazing Jessica Triggs, Coffee sleeve from a favorite cafe in Milwaukee, JR's old ID card from when he was a bike messenger) 

_MG_2146


Senin, 08 Desember 2014

You Should Know: Winter Workwear - Three Essential Cold Office Survival Tips

You Should Know: Winter Workwear - Three Essential Cold Office Survival Tips

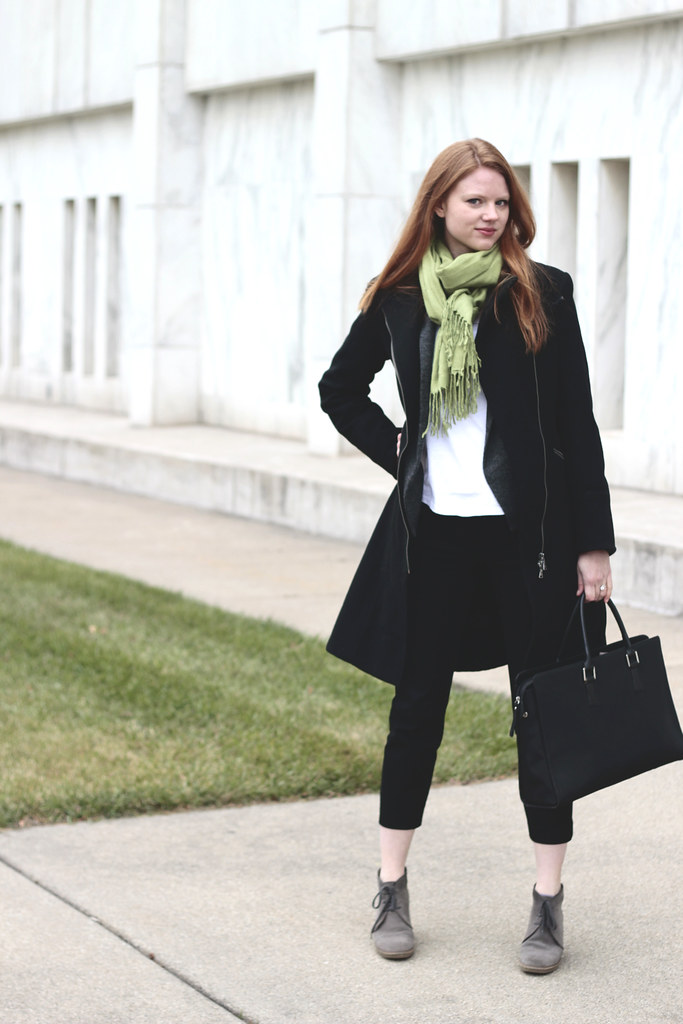
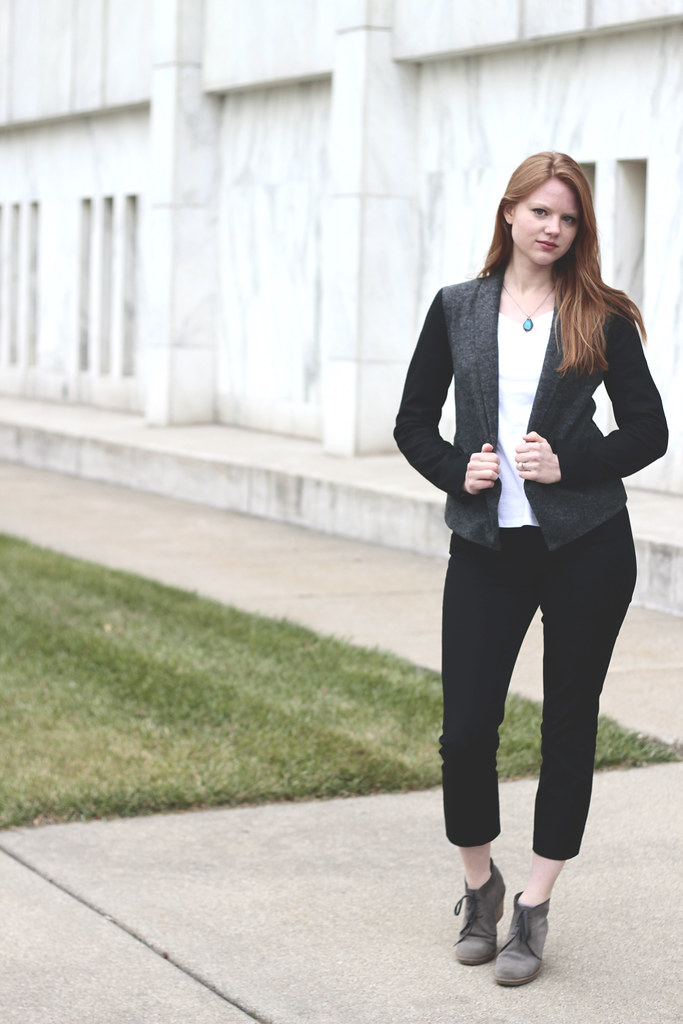
WW5

WW4

This was a year of huge changes. We moved from Colorado to Michigan (talk about culture shock!), I took a break from teaching, and there are more big things in store for us this year, too!

One of the big things that changed was my work dress code. As a teacher it's all about comfortable shoes, durability, and whether or not you have to dry clean your clothes because when you work with 26 eight year olds your clothes will get dirty.  This year I have found myself working in a very different setting! I sit most of the day and the dress code requirements are a stricter than my Colorado Elementary School (no jeans, ever!).

I work in a large drafty studio with huge windows that was built in the early 1900s and the heating and cooling in that place is very inconsistent! I've learned a lot about staying warm at work this year and I wanted to feature a few practical office appropriate outfits that I can wear to work and share what I've learned about working in a c-c-cold place! Luckily I do work in a creative/design oriented department so being fashion forward or trying out a new look to see if it's going to work is totally appropriate...it just needs to be professional!

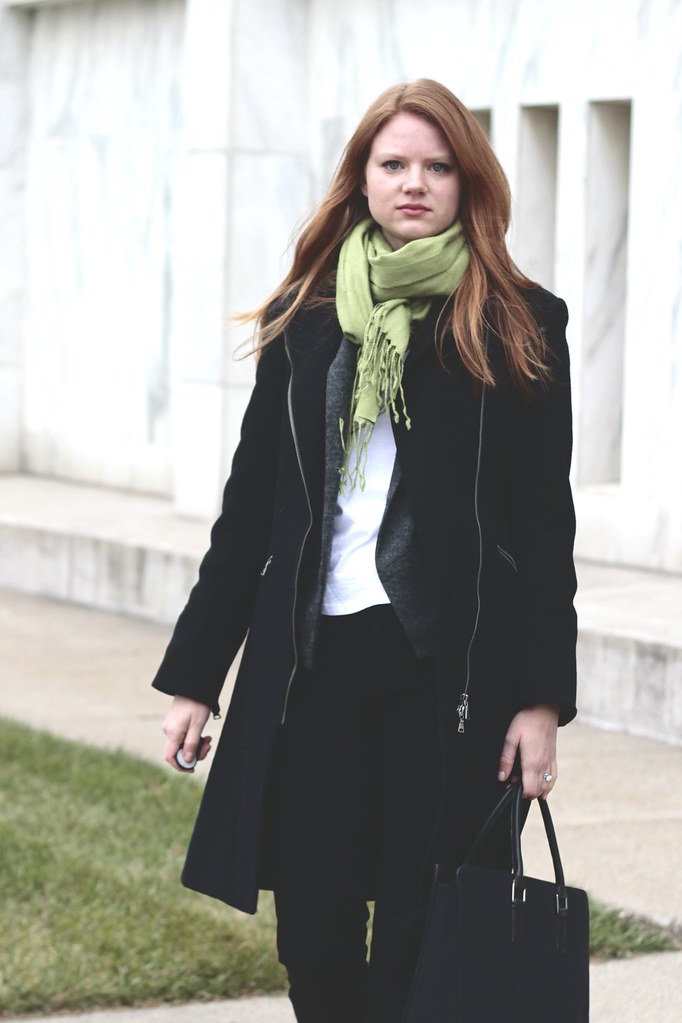
1) Layer Up! - The temperature of my workplace fluctuates from day to day so I have found that layering is the perfect solution. I'll wear three or four thin layers to work so that I can adjust to whatever temperature they decide to set the building at that day. An example of layers would be something like a cotton base layer (tank top), a long or short sleeved shirt, and a blazer or sweater. Sometimes I'll even pair a larger sweater over a blazer or a larger blazer over a cardigan. Layers, especially if you concentrate on a singular color palate and correct fit, can look completely professional. I rotate a few large pashmina scarves with my coats every day, too, and can pull those and put them on even after my coat has been taken off or use them on my lap or around me as a blanket under my desk, too! 

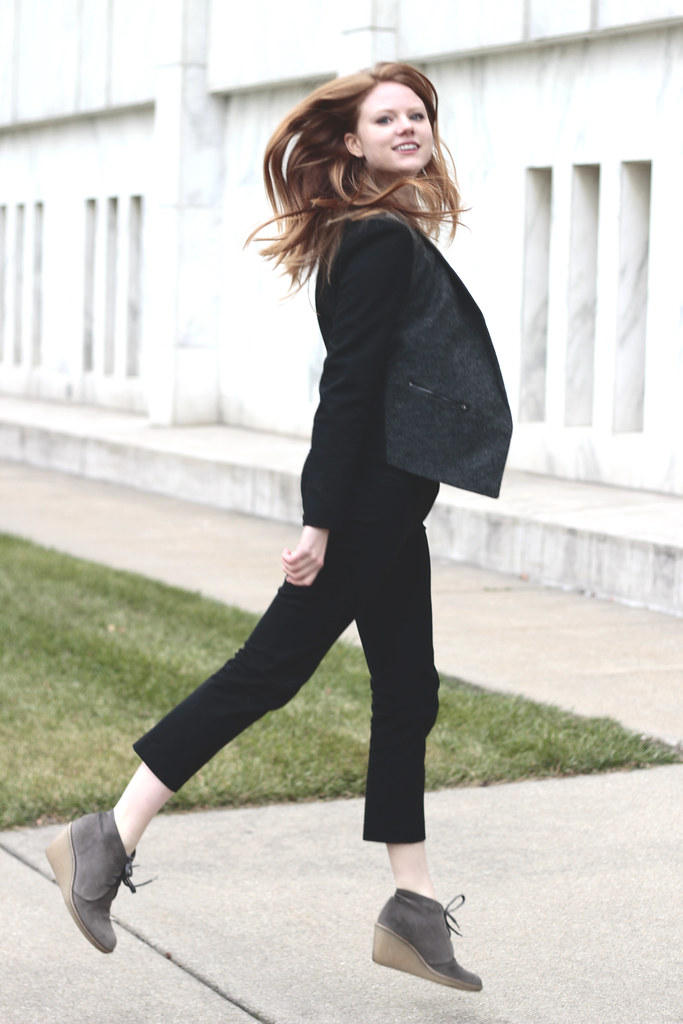
2) Fabric Content Matters! - This is the most important tip I can give you. If you really want to stay warm invest in some wool or cashmere sweaters, blazers, and base layers. I know for sure that a wool sweater is going to be significantly warmer than an acrylic sweater or cotton sweater of the same weight. I don't like bulky, shapeless layers so picking thin layers in the right fabrics helps me to stay put together looking and feeling. The blazer featured in this post is actually a polly/wool blend and is incredibly warm and cozy! I have a few vintage blazers that go a step above and beyond and are a thin wool suiting with a silk lining and they are the warmest of them all! Silk can keep you incredibly warm even though it is very thin. 

3) Coffee/Tea/Hot Cocoa is your friend! - Does your office have a hot water heater or coffee maker in it? Drinking warm beverages really does help warm you from the inside out and can be a great way to cope with a freezing office! If your office doesn't have one, you could consider bringing one in. Many years ago I worked for one winter in an office that didn't have anything like that set up. I bought a super cheap electric kettle (with an auto shut-off!) and some tea and brought it in for everyone to share to help us stay warm and cozy under the guise of it being a winter treat for my co-workers. Everyone loved it and started bringing in their tea, hot cocoa, and even a french press coffee maker for everyone to share. I only invested about thirty bucks in the whole thing but it really helped me stay warm and build the office community. 

WW6

WW8

***
Jacket: Express (ca. 2006, so no longer available.)
Blazer: Ann Taylor ( can't find this online anywhere! I'll update if I do.)
Shirt: Old Navy
Shoes: J. Crew
Purse: Franklin Covey (somewhat similar here)


Kamis, 04 Desember 2014

You Should Know: How to Make Your Own DIY Luxury Sleep Mask

You Should Know: How to Make Your Own DIY Luxury Sleep Mask

Sleep is important, right? It's a fact that's drilled into us from an early age but so many of us, myself included, struggle to get our required 8 hours a night. I don't know if you're like me, but I'm a very light sleeper. I need white noise, complete darkness, and the right type of pillow (memory foam!) in order to make it through the night without disruption.

Recently, I saw Lisa Eldredge's Long Haul Flight beauty routine and the thing that stood out the most to me was the fabulous sleep mask she uses on flights. It had two ribbons instead of an elastic band, was filled with lavender, and was made out of the loveliest fabric. I wanted one to use to sleep with on a nightly basis instead of just throwing a T-shirt over my eyes. When I looked at the price tag (around $100!) I decided I could make my own luxury sleep mask using scraps of fabric from my fabric stash. Surprisingly it took me only about five to ten minutes of sewing to make this! Photographing it took far longer.

DIY Sleep Mask

Materials:
- Scrap Fabric
- Pen
- Paper to draw pattern on
- Thread
- Ribbon
- Sewing Machine
- Pins

_MG_1667

Directions:

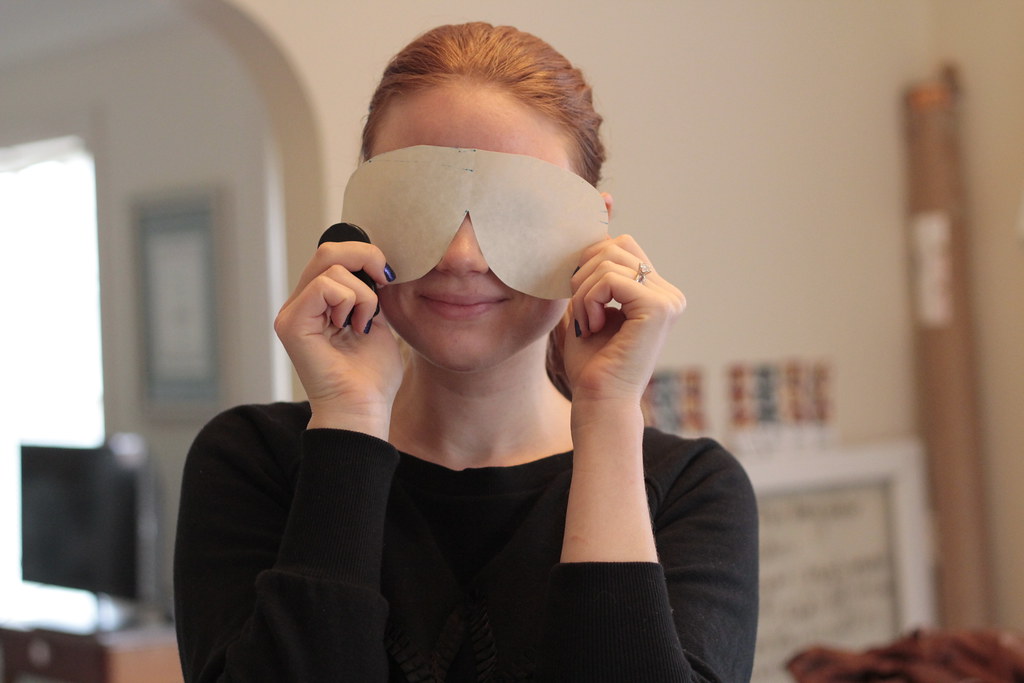
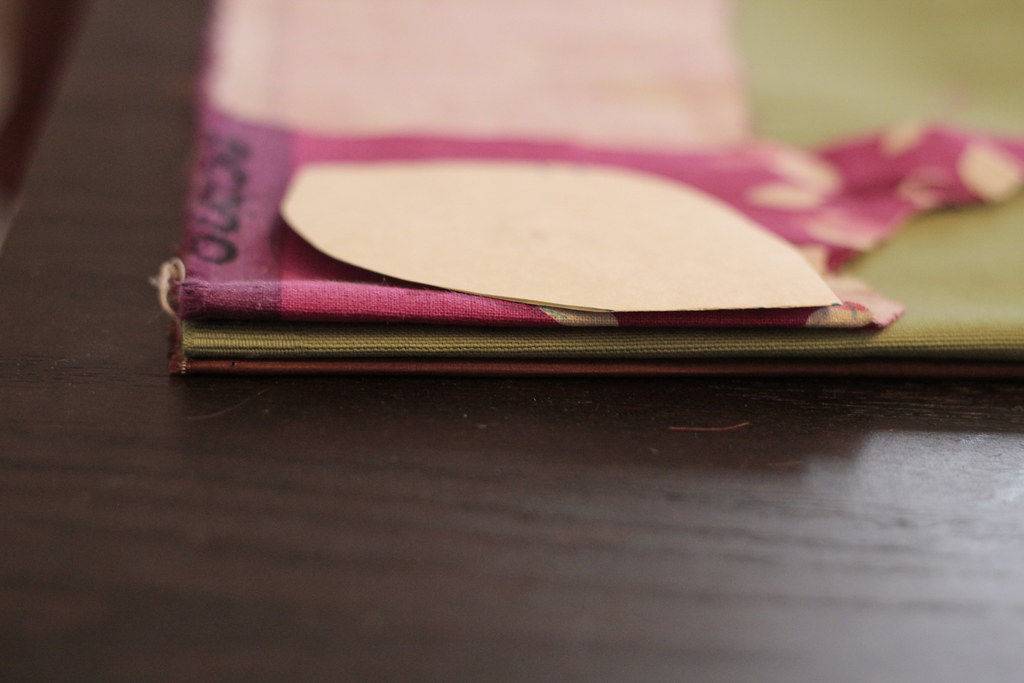
1. Take the paper you are going to use to draft your pattern and draw a sleep mask pattern. You can trace one you already have, you can trace a pair of sunglasses (like I did - old, giant, vintage Ray Bans make a great sleep mask pattern!), or download one from the internet and print it (try here!). Go ahead and cut it out and try it on for size to see if you want to modify it at all!

_MG_1671

_MG_1677

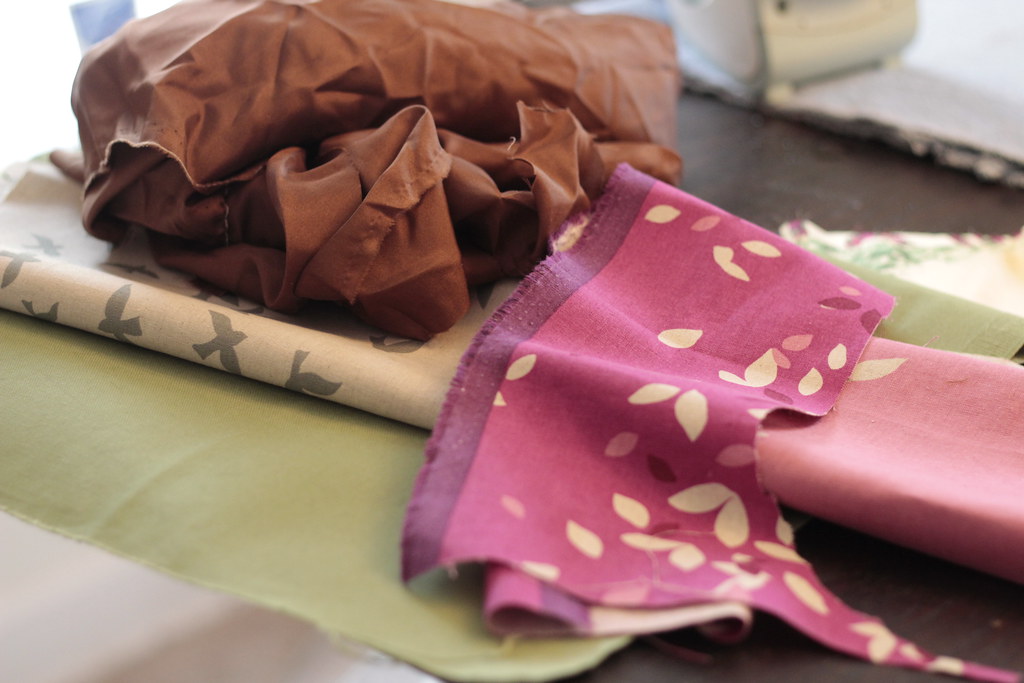
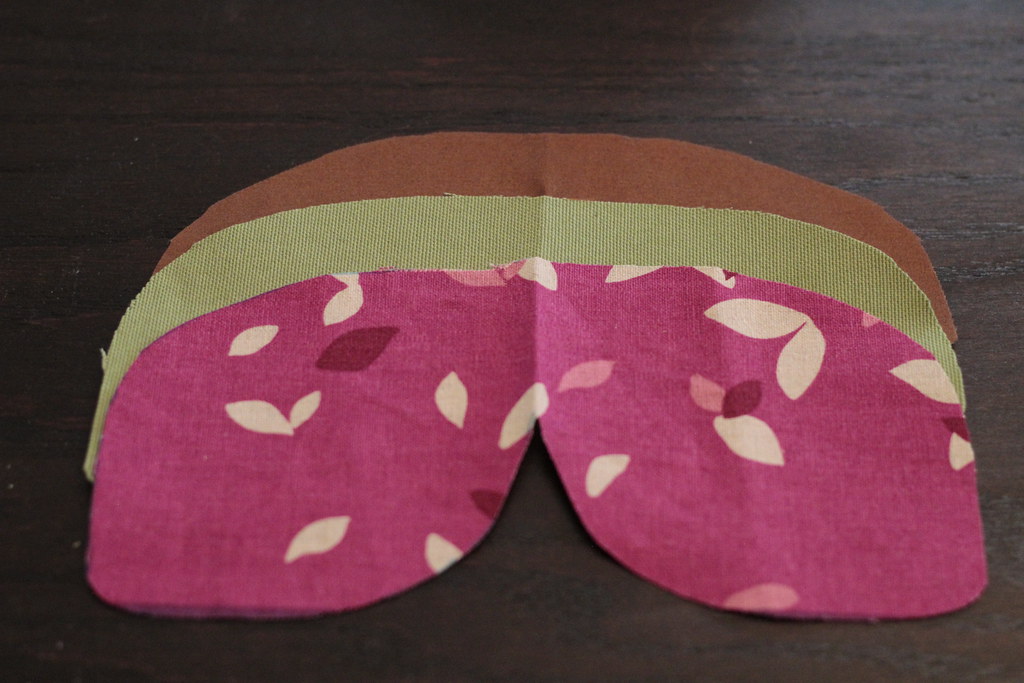
2.  Fold your fabrics in half and stack them on top of each other. I decided to use three per sleep mask - a silk inner lining that rests against my face, a cotton interlining to make sure it blocked out all the light, and a fun japanese linen to decorate the outside! Add the pattern that you just drew on top of it (folded in half and lined up with the folds of the fabric!) and cut through all the layers of fabric. You can also cut them one at a time if you need to.

_MG_1679


_MG_1683

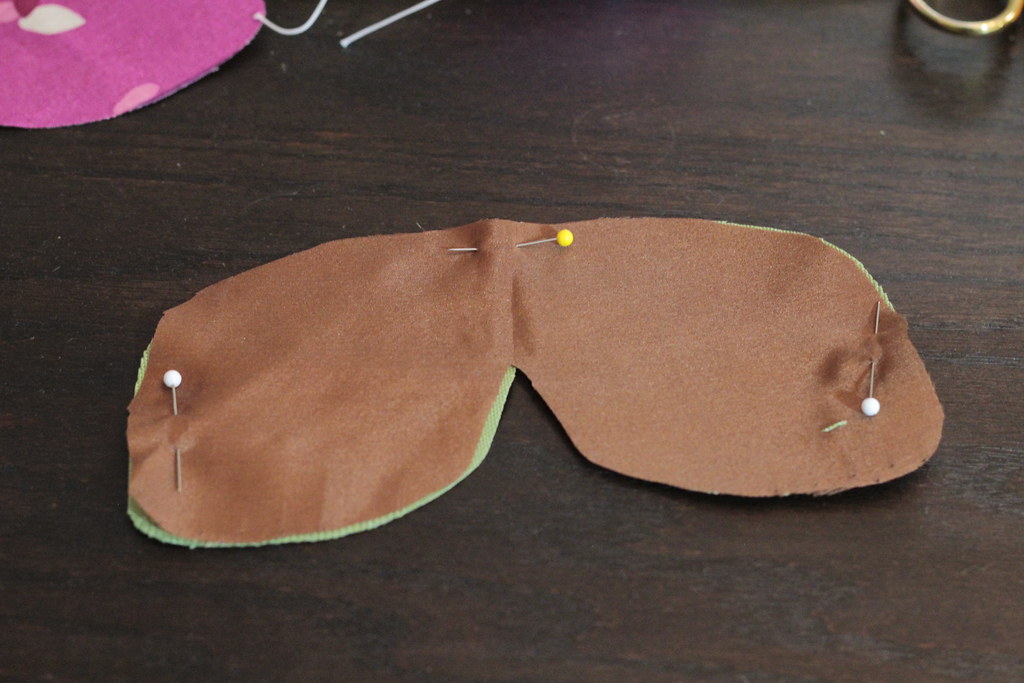
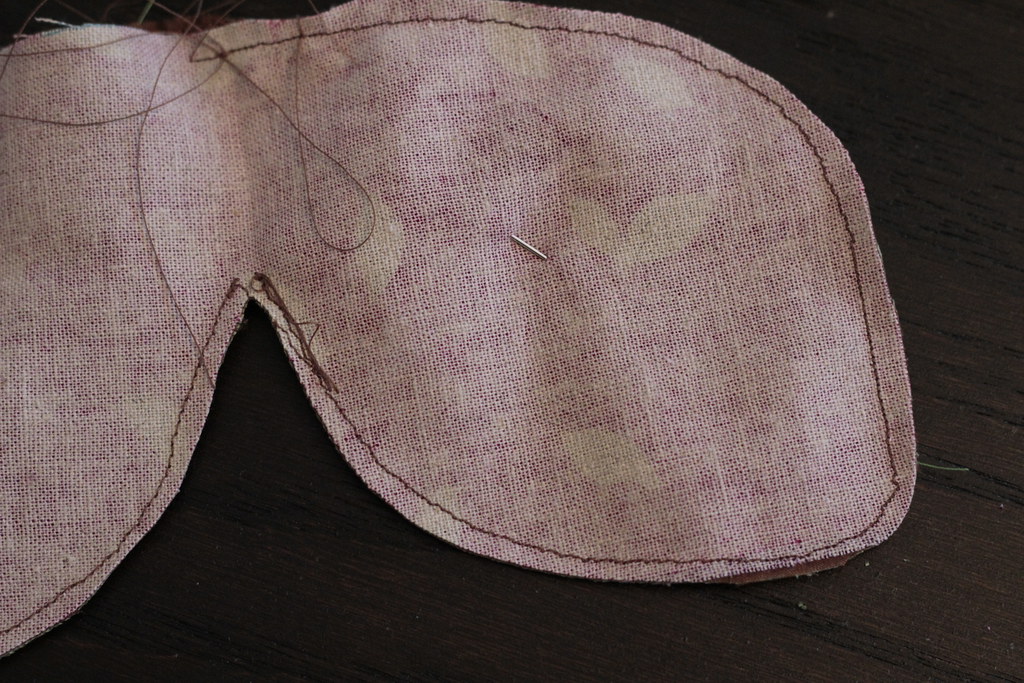
3. Pin the silk layer and the interlining together and sew around the edge so that they become one piece. This will make the silk easier to work with, especially if you used lining silk like I did! 

_MG_1685

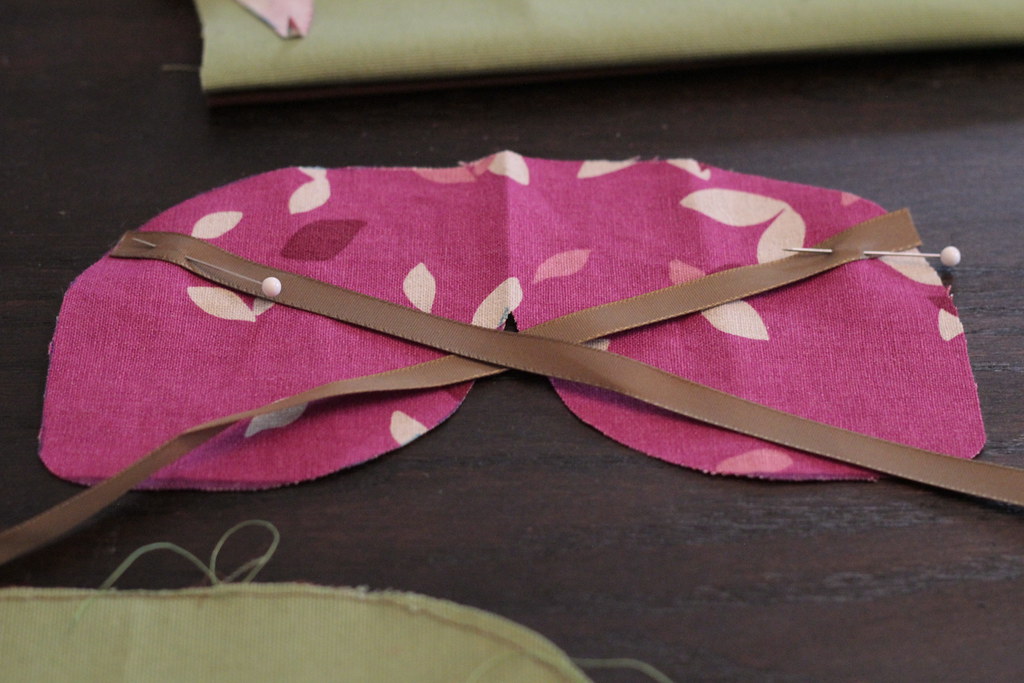
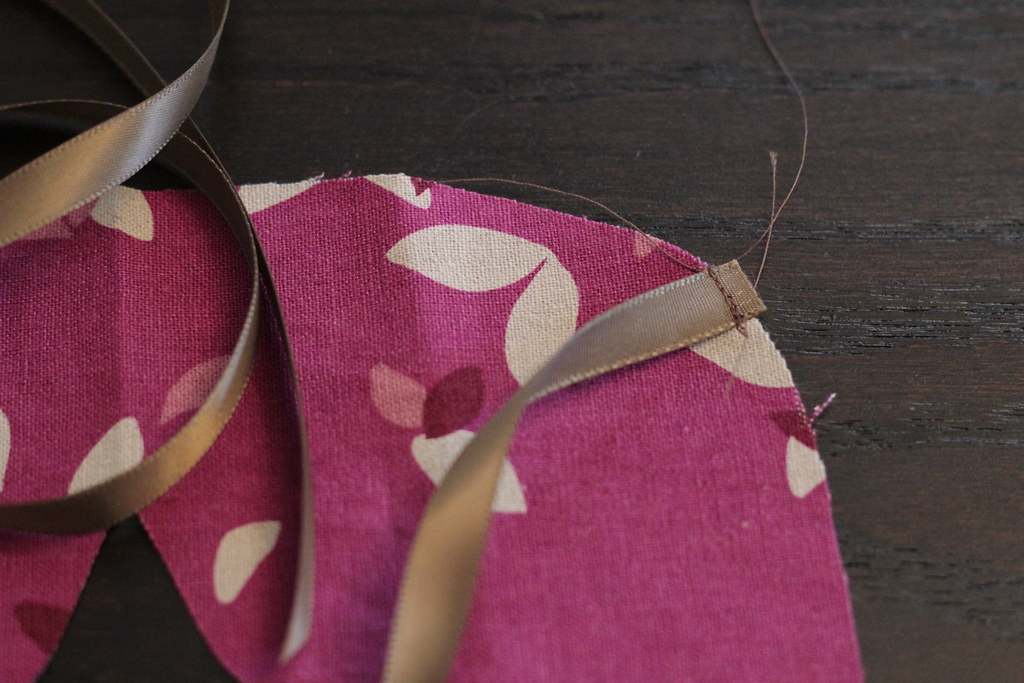
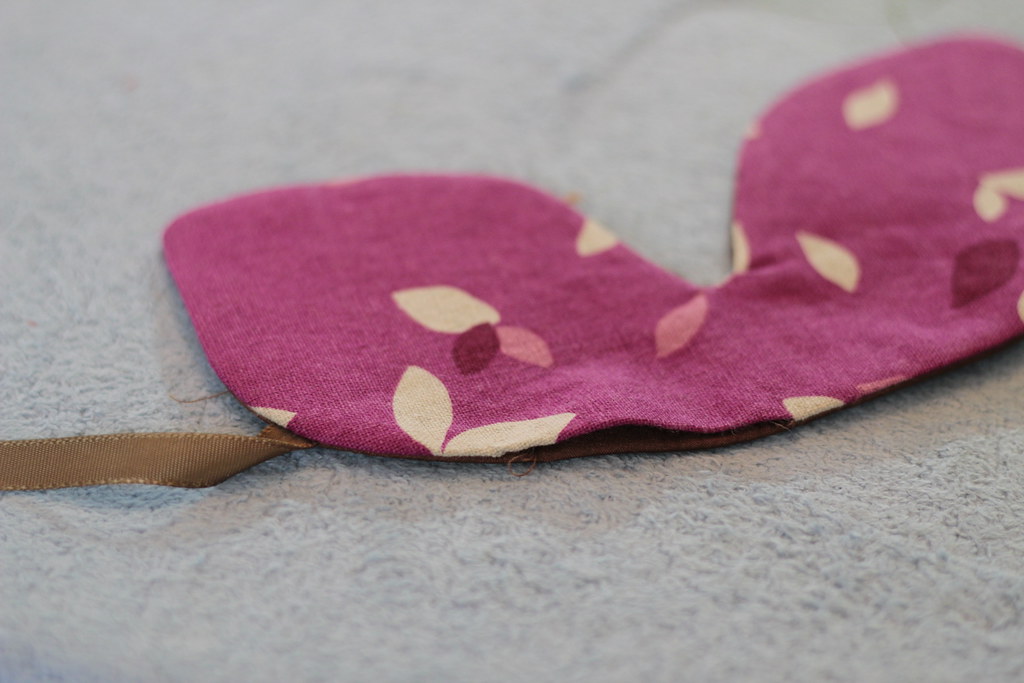
4. Take your ribbon pieces and pin them to the RIGHT SIDE of your fashion fabric. I chose to have them cross so that when they were tied they angled up above the ponytail I always have in my hair when I sleep. Run a few stitches to secure the ribbon so they don't move while you sew the rest of the sleep mask. 

_MG_1691

_MG_1692

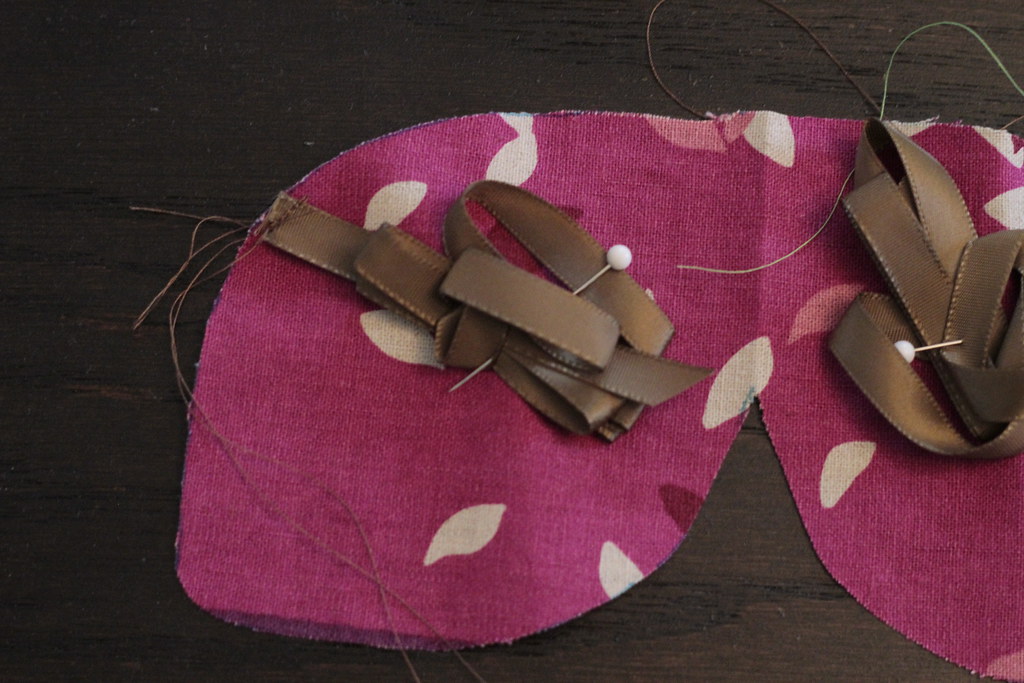
5. Secure the ribbons to the center of the sleep mask using pins - this makes it more difficult to accidentally sew the ribbon into the edges of the sleep mask when you in the next few steps.

_MG_1693

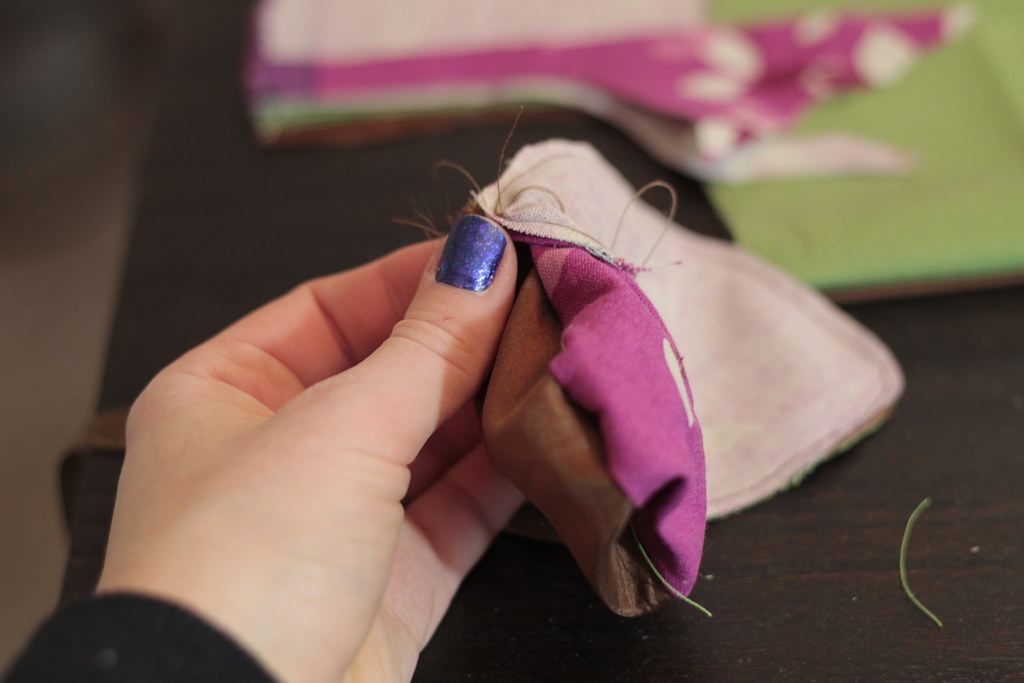
6. Pin the RIGHT SIDES together - this means that I put the silk fabric facing the ribbons that I had just secured onto the fashion fabric and pinned. Sew around most of the edge but leave a little gap to turn the sleep mask inside out. 

_MG_1696

7. Turn the mask inside out using the little gap that you had left. 

_MG_1697

8. Press the sleep mask flat, and concentrate on pressing clean seams for that gap, too. We are going to use the pressing + topstitching to close the gap instead of hand stitching the gap closed. 

_MG_1698

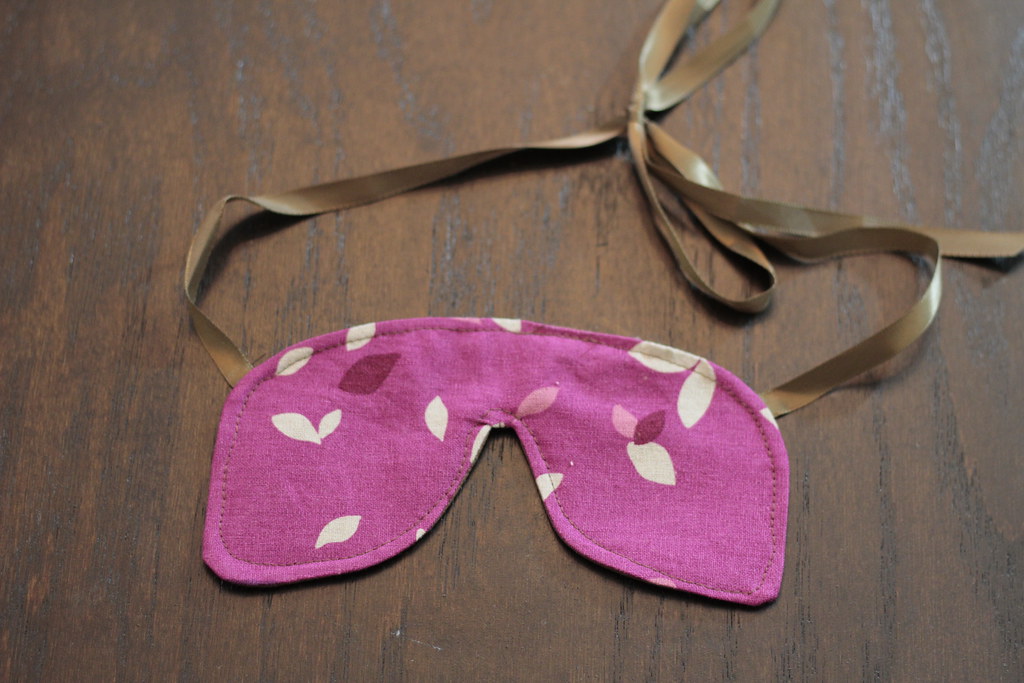
9. Topstitch around the whole mask. This will help stabilize it and close the gap in the mask as well! All done!!!

_MG_1699

_MG_1706

If you have any questions or need anything explained further please feel free to leave me a comment or shoot me an email! If you do make this project I'd love to see a picture, too! 

PS: Have you checked out my giveaway? I'm giving away a few of my favorite beauty products to celebrate my November Beauty Wrap Up! You can find it here

Rabu, 07 Mei 2014

You Should Know: Living Gluten Free: Recipe - Sweet Potato Medallions with Micro Greens, Feta, and Balsamic Glaze

You Should Know: Living Gluten Free: Recipe - Sweet Potato Medallions with Micro Greens, Feta, and Balsamic Glaze

Food7

(Note: This is part two in a gluten free living series! You can see part one here.)

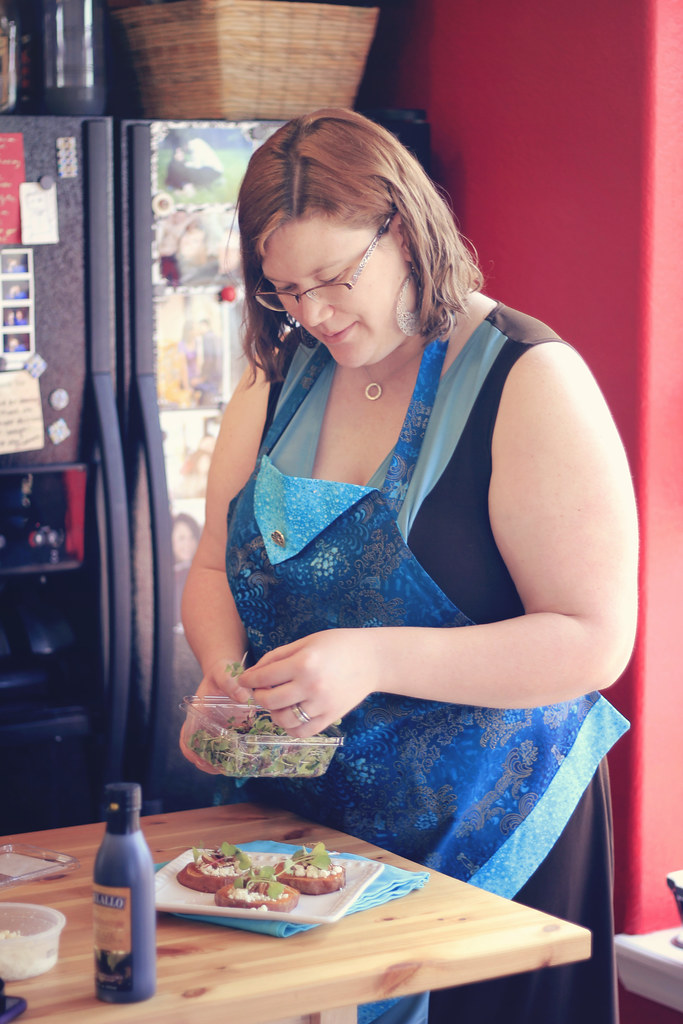
Earlier this month I posted my top five tips for living gluten free. A few weekends ago my friend Stephanie, who blogs over at Sustaining the Powers, and I partnered (well...she cooked...I watched and took photographs and drizzled Balsamic Glaze over the final product!) to work on a very simple gluten free recipe. One of the great things about this recipe is that it is made entirely with foods that are already gluten free. You don't even have to think about replace this or that with expensive or hard to find ingredients.

These sweet potato medallions can be served as a side, main, or appetizer and take very little time to make and prep. The plate up beautifully and can be grabbed one at a time.

Stephanie is a fantastic cook and an amazing multi-tasker. She's also exceptionally skilled at working around dietary needs. Here's an example: one random Wednesdays night, I watched her make seven meals for seven people with different dietary needs on a whim simply because they were hungry. It wasn't even a dinner party! We just showed up and she fed us all. She used basic ingredients in her kitchen and had them all out, plated beautifully and deliciously. I'm still in awe of that skill and she's definitely one of my cooking and hosting inspirations and thrilled that she was willing to partner with me to bring a Gluten-Free Recipe to you!

Sweet Potato Medallions with Goat Cheese, Pecans, Microgreens and a Balsamic Vinegar Glaze

Ingredients:

  • 2 medium sweet potatoes
  • 2-3 tbsp olive oil
  • ½ cup goat cheese
  • Balsamic vinegar glaze or reduction
  • ½ cup chopped pecans
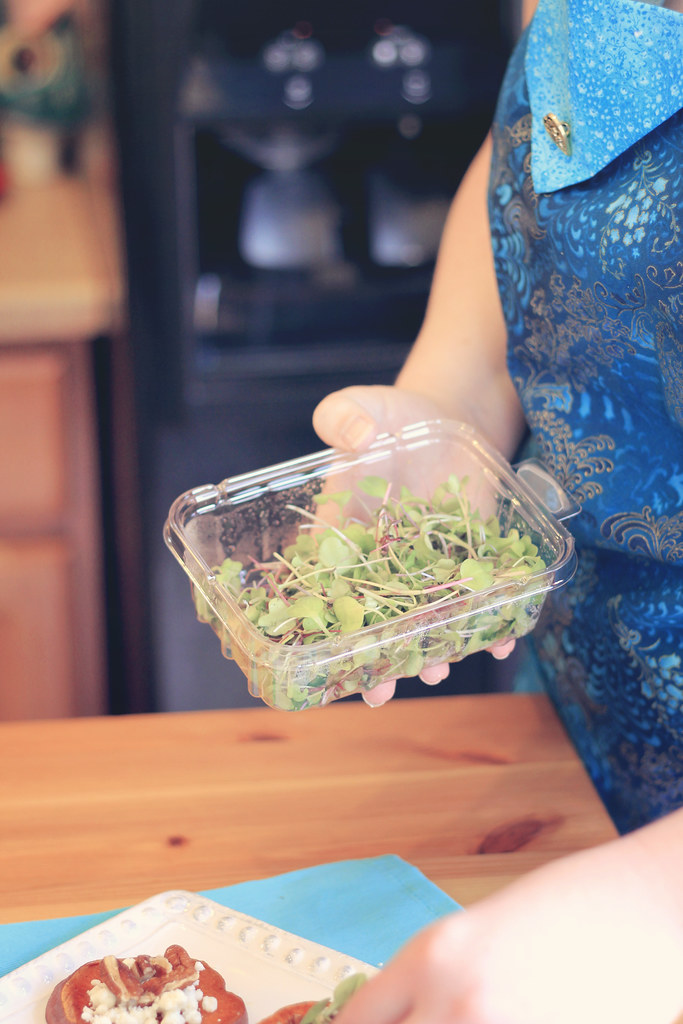
  • ½ cup microgreens (grow your own or find them near the sprouts and lettuce in the veggie section of your grocery)
  • Salt and pepper

Directions:

  1. Preheat oven to 450. 
  2. Spread 2-3 tbsp of olive oil on a jelly roll pan. 
  3. Scrub sweet potatoes, but do not peel.  
  4. Slice sweet potatoes crosswise in 1/2 inch thick medallions and place on oiled pan. 
  5. Flip once so both sides get oil and sprinkle with salt and pepper.
  6. Bake for 15 min. 
  7. Turn over using tongs and bake for another 10 minutes, or until both sides of the potato are blistered and the center is soft. 
  8. Top each medallion with crumbles of goat cheese, pecans, microgreens, and a light drizzle of balsamic reduction or glaze.


food3

Food6

Food2

food5


Kamis, 03 April 2014

You Should Know: Living Gluten Free - Things I've Learned Along the Way

You Should Know: Living Gluten Free - Things I've Learned Along the Way

Bloom8

Bloom2

(This is part one of a series of Gluten Free posts. Look for a post on my favorite Gluten Free Resources coming up soon!)

I've been exclusively gluten free for many, many years. In addition to that my mother incorporated gluten free cooking into our lives even before I went gluten free myself because my sister has a pretty serious case of Celiac that manifested itself when she was a teenager.

My own gluten free journey started when I simply could not get well - I had cold after flu after ache after pain after migraine and underwent the same testing in college and got the same diagnosis. My life completely changed for the better after I took the gluten free plunge and living gluten free turned out to be pretty easy, even in the gluten-free stone age before special marked menus at restaurants and bakeries devoted to gluten free products.

1. Focus on Foods that are Already Gluten Free - This is my number one tip for people when I'm approached by people who are starting their gluten free journey, or are even in the middle of it and are finding it tougher and tougher to sustain the level of prep needed to feed a gluten free child or themselves. When you focus on foods that are already gluten free, like veggies, corn tortillas instead of wheat ones, sushi (if you get the right soy sauce!), and many soups you will find that you have a whole cache of foods that are gluten free without even trying. In fact, I generally think in specific cuisine options - I find Mexican, Vietnamese, Japanese, Indian Food and Soups to be the ones we make the most often at home because they are easily modified (again, we use a gluten free Soy Sauce) or don't need to be modified at all.

2. Find the Gluten Free Hot Spots in Your Area - You know your neighborhood, city, or town and eating gluten free can be easier or harder where you live. I live in Denver which has been great for gluten free living! Almost every single restaurant has a gluten free option or two and most people here are familiar with this. But, it was not always so easy, both in the days before gluten free was a thing and in more rural ares. I have lived in Detroit (much harder!) and Milwaukee (Fair to middling, on the upswing!) in addition to Denver and have done extensive traveling around the country and internationally. Make sure you know where the gluten free friendly places are, both where you live and where you're going. This includes restaurants that allow you to "create" your own dish out of things on the menu ("Please give me a plate with fries, a side of fruit, and some of those cheeses you put on your hamburgers, but no hamburger...") or ones that do have a gluten free menu. It's also good to know where bakeries and gluten free friendly grocery stores are as well.

3. Celebrate Being Gluten Free - Being gluten free will give you an opportunity to experience things you wouldn't normally have done and meet people you wouldn't normally run into. Embrace this! I've always been a bit of a dessert connoisseur so when I travel I seek out gluten free bakeries and those often are located in interesting neighborhoods off the beaten path of a city or are tucked away in small towns. My mother-in-law has really risen to the challenge of having a gluten free family member and we've gone to some great ones in quaint little towns around Philadelphia and I can remember one memorable moment where I made my husband pull a U-turn on our way out to the beach from their house because the words "gluten free" caught my eyes on a sign. Tucked in among the dunes of New Jersey was a gluten free bakery in an old stone house from the 1700s with the most amazing Angel Food Cake. If I hadn't been gluten free we would have missed out on that awesome side trip!

4. Always Pack a Gluten Free Snack - It's not always easy to be gluten free, especially when you're traveling. Hunger can strike at any moment and you could be somewhere where there simply isn't any food you can eat, like an airport, a gas station rest stop on a road trip, or a conference or work event you can't easily leave. To fix this make sure you've packed snacks. I generally go almost everywhere with an apple (they hold up well!) a zip lock bag of a high protein snack like nuts, and a packet from my favorite snack company graze. Having a snack means I'm not stressing about being hungry and getting cranky while doing so.

5. Only Buy Pre-made Gluten Free Foods When Absolutely Necessary - The most expensive part of being gluten free are the pre-made gluten free foods. You can spend your entire grocery budget on these things if you're not careful! I find that baking mixes, recipe books, and ingredients are much, much cheaper and budget friendly. I've established, over the years, a repertoire of easy baked goods and I keep a lot of staple gluten free ingredients like cocoa powder, almond flour, corn starch, and guar gum on hand so I can get busy cooking when the inspiration strikes. Learning how to bake your own does involve trial and error - I've had to toss entire batches of things many times before - but eventually you get your go-to things down. My one exception to buying pre-made gluten free foods is a loaf of bread that I pick up every week to two weeks. I just don't have time to make a loaf of bread every week and having that on hand makes packing lunches extra easy!

I hope that this was helpful for you! What other questions do you have about gluten free living that I can help answer?


Bloom3

Bloom4

Bloom1


***

All photos were taken at the incredible Bloom Bake Shop in Middleton, Wisconsin. Can you believe that every single dessert pictured was gluten free? Many of them were vegan, too! We were there for gluten free wedding cake tastings for my sisters upcoming wedding. Annemarie, the proprietor of the bake shop, was an incredible hostess and an outstanding baker. I haven't eaten a donut in almost a decade and yet she created donuts that were so good I went to sleep dreaming of them!


Minggu, 30 September 2012

You Should Know: How to Avoid Getting Sick - 5 Tips From a Teacher


(My breakfast - designed to help me avoid getting sick - a smoothie with veggie based protein powder, mixed greens, almond milk, and frozen berries)

My lovely husband is sick today - sneezing, sniffling, dripping everywhere. I’m working really hard to avoid getting sick from him. Also, cold and flu season is just around the corner. I’m a teacher and I’m around sick kids a lot. I really try hard to stay healthy through diet and lifestyle but sometimes you have to go a bit further, especially when parents send their kids to school sick or someone is sick around you. Here are the top five things I’ve found that help!  
1. Avoid sick people. Yup. Avoid them. This one sounds harsh but it’s totally the number one thing you can do to keep yourself from getting sick. Try to stay away from the air they are breathing, the things they are touching. Don’t sleep next to them. I always kick my husband onto the couch when I’m sick and when he’s sick I go for an air mattress. When a student is sick I try to help them from a distance, without putting my face to near to their hands or face. This is still totally effective teaching and helps keep me from having to get a sub a few days later…which is generally not effective teaching.  
2. Don’t touch your face, nose, or mouth! This advice was given to me by a doctor when I was really sick during student teaching. There’s only a few ways for germs to enter your body and your hand connecting with one of them is a sure fire way to get sick. If my eyes itch I’ll scratch them while holding a tissue or use part of my sleeve in a pinch. I wash my hands before food prep and try to use utensils instead of my fingers to eat. When I put my moisturizer on my face I make sure that my hands are clean both to avoid bacteria in my pores and also to avoid germs that could make me sick!
3. Wash your hands! This was alluded to in the previous point, but washing your hands and washing them frequently is such an important thing! Hopefully I’m preaching to the choir with this one but it’s important to get rid of those germs. You can really make handwashing as fun or as boring as you want to. At work it’s whatever soap they provide but at home I go for the Method soaps in the fun containers and of course minty smelling soap! I generally do liquid over bar soap because it makes my sink less messy! Wash all the time, especially before food prep and eating and…do I even need to say it…after you use the restroom!
4. Rest and hydrate! If you find yourself feeling like you’re coming down with something…rest! I try to get as much off my schedule, I stop training cold turkey for a day or two, and I just hydrate and rest. I try to nap, and give my body the space to use the energy I’d generally be putting in at the gym to repair the damage before it gets too intense.
5. Eat Right. I hope that this is one thing that you already do! Eating lots of great living foods, healthy grains, lower amounts of sugars…I believe that would be called eating clean…is the best thing you can do! Having good food will give you a good immune system and having enough vitamins and minerals help with that, too. I personally take a high quality multivitamin purchased through my natropath with a healthy dose of Vitamin C to help with absorption. I also strive for 9 servings of fruits and veggies a day and try to stay away from refined sugars. Eating healthy is a little less easy to do when you are on your way to getting sick because your energy is drained but it’s the number one thing you can do to help keep yourself healthy. When I’m getting sick I get Zicam (I’ve found it’s the best of the cold remedies out there for my physiology) and take a few zinc supplements on top of it. I completely cut all sugars (including fruit sugars) out of my diet because I know bacteria loves sugar and uses sugars to multiply, and really, really go crazy with the veggies and hot soups. I make a huge kettle of Veggie Soup and just eat that for a few days as needed and the heat and liquid helps you stay hydrated and clear out those sinuses. I put Cayenne pepper in it, tons of garlic, organic veggie broth, rosemary, and any veggie that looks appealing into it. I snack on carrots and bell peppers and Kale chips. 

Top